Gemstone trees are lovely tools and decorations that can transform your living space. You can use any type of gemstone for this DIY project. It is a fantastic way to instill those energies into any space.
These trees are also used in Feng Shui practices. It is a practice that helps to connect us to nature. The tree symbolizes the wood element. Wood is related to growth and kindness.
However, these trees can be used in whatever way you want.
Use it for just decoration.
Or, maybe you would like to use it with crystal meditation.
Perhaps, it is to utilize its energy to cultivating the type of energies that are allowed to dwell in your space.
Regardless of the reason, these gemstone chip trees are beautiful additions to your home. Learn how to make it below!
Possible Gemstone Chip Tree Types
Crystal trees are all over the internet. It is incredibly versatile. Once you know the general technique for making a tree, you can use it to evolve into creating other types.
For a while, I was looking for a specific tree. After tinkering around, I found a technique that I really liked. It gives the tree more texture. Most importantly, I figured out how to make the tree I wanted!
Before we dive into this gemstone chip tree DIY, I want to display some options you may not have considered.
How to Choose Your Gemstones for Your Gemstone Tree
Gemstones have varying properties. It is essential to research which rock you want to use on your gemstone tree.
Here are some honorable mentions to consider:
Amethyst
This one is top of the list due to amethyst’s ability to block geopathic stressors. Geopathic stressors cause disruptions in the Earth’s natural energy vibration. They include:
- Tunnels
- Sewers
- Pipes
- Utility lines
- Underground water
- Mineral deposits
- Random cracks in the Earth’s crust
Don’t you think this is important? Medical documents confirm this can play a crucial factor in a person’s health and sudden decline.
It has intense healing and cleansing powers. Amethyst helps to overcome addictions and blockages of all kinds. M makes realistic goals easier to accomplish due to its ability to improve your motivation and memory.
Carnelian
Carnelian is another beautiful stone, for it cleanses away energies and emotions acquired throughout the day and re-invigorates you. Allowing you to become re-energized and promoting courage to conquer the day. It also facilitates a warm, loving, and passionate environment.
When placed by your front door, it invokes protection and invites abundance into your home.
Tourmaline
Tourmaline is terrific when placed in your work area. It comes in all sorts of colors. Due to the wide variety of colors, they are fantastic at balancing your chakras. A little information about some of the color’s properties are:
- Black is highly protective. It creates a forcefield that negates negative energies and electromagnetic fields (EMF).
- Pink offers healing benefits to your body while also promoting joy and love.
- Yellow boosts your energy levels.
- Red boosts your confidence and encourages taking action.
There are other colors that you can read about here.
The gemstones mentioned above are not the only practical options to consider. These are honorable mentions of powerful stones that may get overlooked. Take some time to research and find which stone fits what you’re looking for!
Some Possible Tree Types to Model Your Gemstone Tree After
You can do any type of tree you would like. Once you learn the general technique, you can tweak it to fit any design you want.
Perhaps you would like to recreate a favored tree from your childhood or your favorite tree. It is all possible!
The design I bring to you today is a birch tree. However, I do plan to do a weeping willow tree in the near future. That is a nostalgic tree for me, and I wish to make it. I will make it to using this exact technique I will be teaching you today!
Just bear in mind that adjustments will need to be made to consider the tree’s structure. For instance, I would cut more pieces of wire for the pine tree. Add more gemstone chips per wire strand as you get closer to the tree’s base to resemble its natural shape.
As for the weeping willow, the length of the wires will need to be extended to accommodate the long branches of the natural tree. 3 to 5 mm chip beads would be ideal for this tree. The number of wires doesn’t need to be increased, but that is up to your discretion.
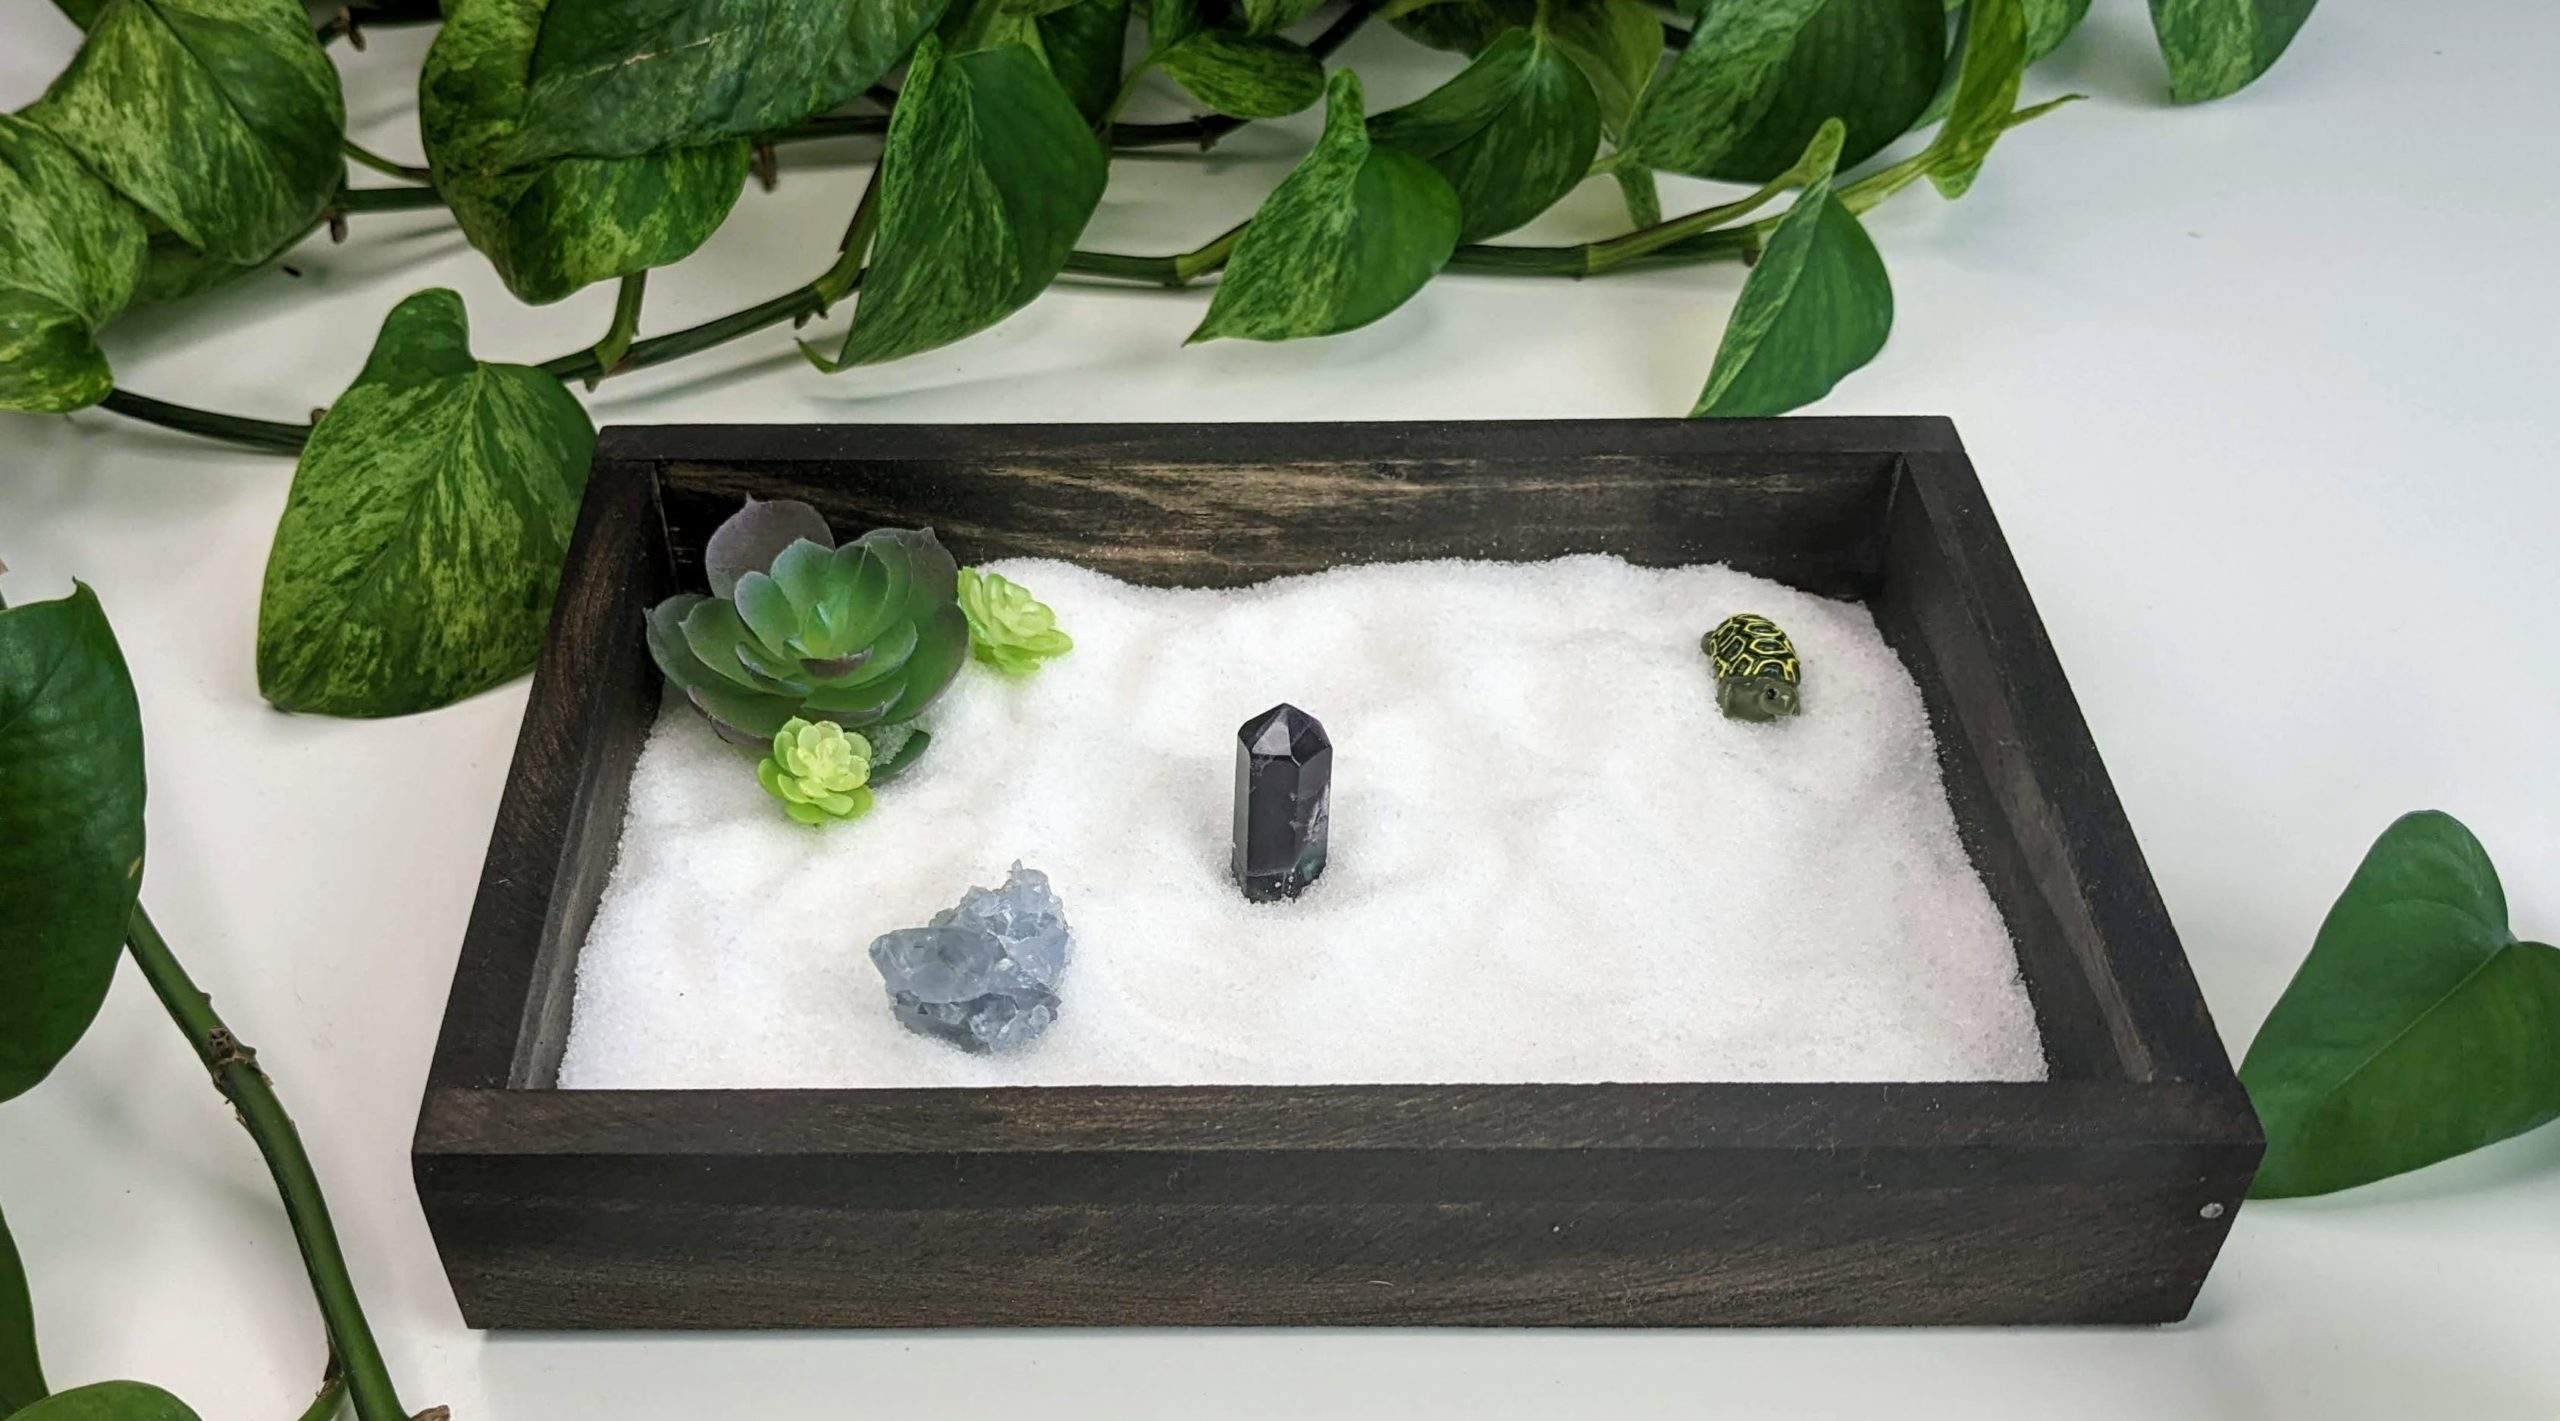
Gemstone Chip Tree Base Ideas
This DIY is specifically made for making a gemstone chip tree for your Zen Garden using artificial moss balls. However, this technique can also make any type of gemstone tree.
Possible base ideas:
- Wood
- A larger piece of gemstone
- Resin
Regardless of the base you choose, you will need to figure out how you will attach the tree to it and not topple over. With the wood and gemstone option, you will probably need to drill a hole for the tree trunk. That will require more tools.
Another option is to wrap the ‘roots’ of your gemstone chip tree around the base to secure the tree. That can be a creative option.
Resin is a unique option, but make sure safety is taken seriously. Fortunately, there are many YouTube tutorials out there that can teach you how to safely handle it.
Wire Wrapped Gemstone Chip Tree DIY
The length of the wire will depend upon the size of the tree you are aiming for. In the pictures shown, the tree’s height is 3-inches, not including the artificial moss ball.
My base is an artificial moss ball that is used in Zen Gardens. I chose this base because the gemstone chip tree will be used in my Zen Garden. When I made my Zen Garden, I also got a tool kit with these artificial moss balls. After much thought, I came up with the idea of using them to place a gemstone chip tree in my garden!
This tutorial can be used to make any type of gemstone tree. So, have fun with it! 😊
Materials
Ruler
Round nose pliers (optional)
Instructions
- Figure out how big you want your tree.
- Multiply that height by 4. That is the longest length you will cut for your wire.
- Measure 2 pieces of the wire using that length and set them aside.
- Subtract 1-inch to that initial length you got in step 2, and cut 3 pieces of wire with this length. Set aside.
- Subtract 2-inches to that initial length you got in step 2, and cut 5 pieces of wire with this length. Set aside. You should have a total of 10 pieces of wire cut.
- Side Note: if you are trying to make a weeping willow or pine tree type of gemstone tree, then you will need to either adjust the lengths of the wire (for weeping willow) or cut more wires (pine tree). Pull up a picture of the tree you want and make your adjustments.
- Slightly bend your wire in half and add your first gemstone chip to the wire. Bend the wire the rest of the way once you thread your gemstone chip bead.
- Twist the wire a little to create your first small branch. Make sure you are not twisting too far down. Aim to have about 3 to 4 gemstone chip beads on each wire piece.
- Add another gemstone chip to the wire and create another small branch. Repeat for gemstones 3 and/or 4. Once you finish adding the number of gemstones you want to the wire piece, continue twisting the wire to the end of the wire.
- Repeat steps 7 and 8 for the remaining wires.

- Great, you now have 10 tree branches in front of you! Now, it is to make the trunk. Grab 2 or 3 of the twisted wire branches and combine them by twisting the wires together. Repeat with the other wires.

- The ‘branches’ should be twisted together at varying heights. Like in my picture, the gemstones are not the same height at the top; there are varying heights. It makes it look more ‘natural.’
- The ‘branches’ should be twisted together at varying heights. Like in my picture, the gemstones are not the same height at the top; there are varying heights. It makes it look more ‘natural.’
- You will take the now twisted pieces and continue to combine them all by twisting until you have one solid tree.

- Poke a hole in the artificial moss ball just big enough to put the wire trunk through with the round nose pliers.
- Push the wire trunk through your base until roughly ½ inch is on the bottom, then separate the wires slightly. Bend then to the underside of the moss ball, as shown in the photo below.


- Put your new gemstone chip tree into the sand or salt of your Zen Garden. I recommend having it slightly buried into it for stability.


Example for Figuring Out Wire Lengths for Gemstone Tree
- The height of my tree I want shown coming out of my moss ball will be 3 inches at the highest peak.
- 3-inches × 4 = 12-inches
- Measured out and cut 2 pieces of 12-inch wires
- Measured out and cut 3 pieces of 11-inch wires
- Measured out and cut 5 pieces of 10-inch wires
I have a total of 10 pieces of cut wire.
Tips For You Gemstone Chip Tree
- Don’t leave in direct sunlight. The sun could cause the crystal to become fade after enough exposure.
- The lower the wire gauge, the tougher the wire. Tougher wire = more difficulty twisting the wires at the end.
- Pay attention to the size of the gemstone chips. The size gemstones I used were roughly 3-5mm. My tree is small, so I wanted a finer bead.
- Use soft wire or craft wire. If you buy pure copper, pay attention to the wire hardness.